
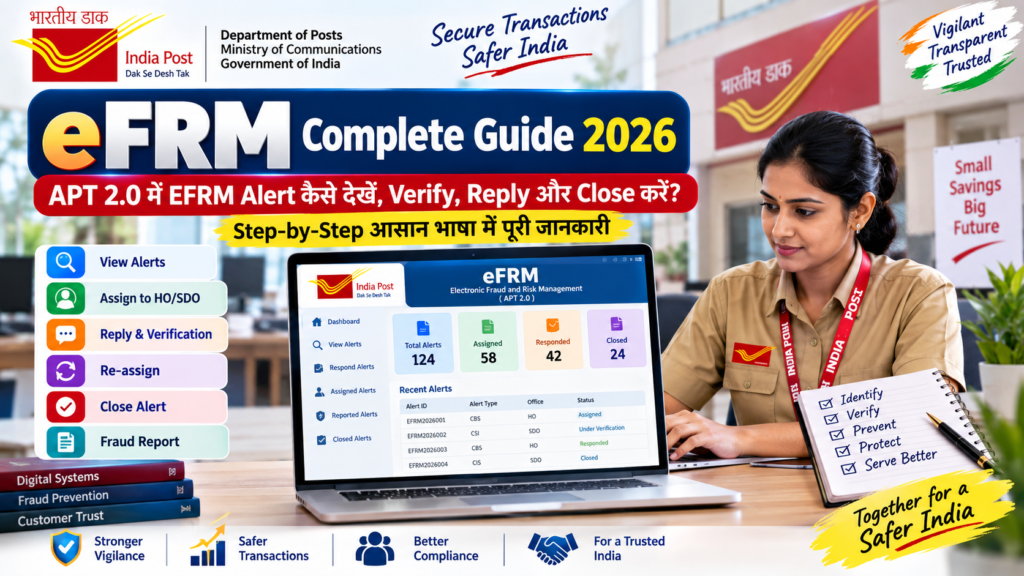
eFRM Complete Guide 2026: APT 2.0 में EFRM Alert कैसे देखें, Verify, Reply और Close करें?
India Post के APT 2.0 में eFRM क्या है, Alert कैसे देखना है, HO/SDO को assign करना है, reply कैसे करना है और alert को close, re-assign या further action के लिए report कैसे करना है — पूरी जानकारी आसान भाषा में।
Department of Posts में fraud risk management को लेकर technology का इस्तेमाल लगातार बढ़ रहा है। इसी दिशा में eFRM (Electronic Fraud and Risk Management) को APT 2.0 के workflow में शामिल किया गया है, ताकि suspicious alerts को एक structured digital process के माध्यम से देखा, assign, verify और आगे process किया जा सके।
अगर आपके APT 2.0 में eFRM से जुड़ा काम आता है, तो शुरुआत में इसका workflow थोड़ा confusing लग सकता है। खासकर यह समझना जरूरी है कि FRMU से alert आने के बाद Division, HO और SDO level पर कौन-सा काम होता है और किस stage पर reply, re-assign या closure किया जाता है।
इस article में उसी practical workflow को step-by-step समझाया गया है। इसमें dashboard, View Alerts, Respond Alerts, alert assignment, verification response, re-assignment और closure से जुड़ी मुख्य बातें शामिल हैं।
2026 में eFRM क्यों महत्वपूर्ण है?
APT 2.0 के EFRM operational documentation में suspicious alerts को digital तरीके से process करने का workflow दिया गया है। उपलब्ध documentation के अनुसार system में alerts को assign, reply, re-assign, verify और close करने की सुविधा रखी गई है।
इसलिए eFRM को केवल एक नया dashboard समझने के बजाय alert verification और fraud-risk monitoring workflow के रूप में समझना ज्यादा सही है।
eFRM क्या है? – आसान भाषा में
EFRM का Full Form – Electronic Fraud and Risk Management है।
APT 2.0 में eFRM का उपयोग Department of Posts के suspicious alerts को देखने और उनके आगे के processing workflow को manage करने के लिए किया जाता है।
इसमें role के अनुसार alert को देखना, concerned HO/SDO को assign करना, verification के बाद response देना तथा Division level से आगे की action करना शामिल है।
इस Article में क्या मिलेगा?
- eFRM क्या है?
- EFRM Full Form
- FRMU और eFRM में क्या अंतर है?
- eFRM Dashboard
- View Alerts कैसे देखें?
- Alert को HO/SDO को कैसे Assign करें?
- HO/SDO में Alert का Reply कैसे करें?
- Alert को Re-assign कैसे करें?
- Alert Close कैसे करें?
- Fraud Detected / Further Investigation
- eFRM में Alert Types
- Common Mistakes
- Security और Confidentiality
- eFRM FAQ
eFRM क्या है?
eFRM यानी Electronic Fraud and Risk Management Department of Posts के APT 2.0 environment में suspicious alerts को handle करने के लिए तैयार किया गया workflow है।
इसका basic उद्देश्य यह है कि alert generate होने के बाद उसे केवल किसी list में पड़े रहने के बजाय संबंधित level तक पहुंचाया जाए, verification कराया जाए और प्राप्त response के आधार पर आगे की कार्रवाई की जाए।
उपलब्ध APT EFRM documentation में Division और HO/SDO users के लिए अलग-अलग functions बताए गए हैं। इसलिए screen पर दिखाई देने वाले options user की role/access के अनुसार अलग हो सकते हैं।
EFRM Full Form क्या है?
EFRM = Electronic Fraud and Risk Management
यह terminology APT 2.0 के उपलब्ध EFRM operational documentation में इस्तेमाल की गई है।
FRMU और eFRM में क्या अंतर है?
FRMU और eFRM को लेकर सबसे ज्यादा confusion यहीं होता है। दोनों को एक ही चीज समझना सही नहीं है।
| FRMU | eFRM |
|---|---|
| Fraud Risk Management Unit | Electronic Fraud and Risk Management |
| Fraud risk management से जुड़ी organisational/unit व्यवस्था | APT 2.0 में alerts को process करने वाला digital workflow/module |
| Alerts/scenarios और monitoring framework से जुड़ा role | Alert viewing, assignment, response और further action का digital process |
FRMU की detailed जानकारी के लिए हमारा FRMU Complete Guide 2026 भी पढ़ सकते हैं।
eFRM Dashboard में क्या दिखाई देता है?
EFRM documentation के अनुसार Dashboard में alert statistics से संबंधित information दिखाई जाती है। Role के अनुसार इसमें alerts assigned, closed और responded जैसी स्थिति का overview मिल सकता है।
HO/SDO को assigned alerts की स्थिति।
Division level पर close किए गए alerts की स्थिति।
HO/SDO द्वारा response दिए गए alerts की स्थिति।
eFRM में View Alerts कैसे देखें?
APT 2.0 में EFRM card के अंदर View Alerts section से उपलब्ध alerts और उनकी स्थिति देखी जा सकती है।
Division login में उपलब्ध documentation के अनुसार अलग-अलग categories में alerts दिखाई दे सकते हैं, जैसे FRMU द्वारा assigned alerts, HO/SDO को assigned alerts, reported alerts और closed alerts।
Alert Search / Filter
Available operational guide में alerts को date range, alert type, office type और संबंधित HO/SDO के आधार पर filter करने के options बताए गए हैं।
किसी specific alert की जानकारी देखने के लिए View Details option का उपयोग किया जा सकता है। Alert details को PDF के रूप में देखने/download करने की सुविधा भी documentation में बताई गई है।
eFRM में कौन-कौन से Alert Types दिखाई दे सकते हैं?
उपलब्ध APT EFRM FAQ और operational guide में alert type selection के अंतर्गत CSI, CBS, CIS, ALL और Other options बताए गए हैं।
- CSI
- CBS
- CIS
- ALL
- Other
Alert को HO/SDO को कैसे Assign करें?
Division level पर जब alert verification के लिए concerned Head Office या Sub-Divisional Head को भेजना हो, तो EFRM में assignment workflow का उपयोग किया जाता है।
APT 2.0 में EFRM card खोलें और संबंधित Respond Alerts section में जाएं।
Assign किए जाने वाले pending alerts को देखें और आवश्यक filters लगाएं।
जरूरत के अनुसार View Details से alert की जानकारी देखें।
Office Type और संबंधित HO/SDO का selection करें।
आवश्यक Alert ID select करके assignment submit करें।
Operational guide के अनुसार multiple Alert IDs को एक साथ select करके assignment किया जा सकता है।
HO/SDO में Assigned Alert का Reply कैसे करें?
जब Division किसी alert को HO या SDO को assign करता है, तो वह संबंधित user’s EFRM workflow में assigned alert के रूप में दिखाई देता है।
HO/SDO user alert की details और उपलब्ध transaction information को देखकर applicable verification के बाद response submit कर सकता है।
Reply में उपलब्ध प्रमुख options
- Genuine – जब verification के आधार पर alert genuine पाया गया हो।
- Request for verification through Sub-Divisional Head – जब further verification की आवश्यकता हो।
- Report for Investigation – जब मामला further investigation के लिए report करना हो।
- Other – जब उपलब्ध options में मामला fit न हो।
Response के साथ आवश्यक comments और applicable verification details सही तरीके से दर्ज करना महत्वपूर्ण है।
Alert का Reply देते समय एक बात जरूर ध्यान रखें
केवल alert देखकर conclusion न निकालें। उपलब्ध records, system-generated information, office records और applicable departmental instructions के अनुसार verification करें। अगर मामला further verification या investigation मांगता है, तो appropriate option select किया जाना चाहिए।
eFRM Alert को Re-assign कैसे करें?
हर alert का पहला response ही final नहीं होता। कुछ मामलों में additional verification की आवश्यकता हो सकती है। ऐसी स्थिति में available workflow के अनुसार Division alert को आगे re-assign कर सकता है।
EFRM operational guide में replied alerts पर action लेते समय Re-assign for further verification का option दिया गया है।
- Replied alert को open करें।
- Alert details और received response को check करें।
- यदि additional verification आवश्यक हो तो re-assignment option select करें।
- Concerned HO या Sub-Division का selection करें।
- Required action submit करें।
eFRM Alert Close कैसे करें?
Available APT EFRM documentation के अनुसार HO/SDO स्वयं final closure नहीं करता। HO/SDO से response प्राप्त होने के बाद Division level पर आगे की action की जाती है।
यदि verification के बाद alert genuine पाया जाता है और closure उचित है, तो Division level workflow में Genuine option के माध्यम से closure process किया जा सकता है।
Closure से पहले क्या देखें?
- क्या alert की proper verification हो चुकी है?
- क्या relevant records check किए गए हैं?
- क्या response में पर्याप्त observations/comments हैं?
- क्या further verification की जरूरत तो नहीं है?
- क्या applicable departmental instructions के अनुसार action लिया गया है?
Fraud Detected या Further Investigation की स्थिति में क्या करें?
यदि verification के दौरान ऐसा मामला सामने आता है जिसमें further investigation आवश्यक हो, तो alert को सामान्य genuine alert की तरह close नहीं किया जाना चाहिए।
Available EFRM workflow में Division level पर replied alert के लिए Fraud Detected और further action/reporting से जुड़े options दिए गए हैं।
Fraud Detected option का उपयोग केवल तब किया जाना चाहिए जब verification और उपलब्ध facts के आधार पर ऐसा conclusion applicable process के अनुसार justified हो।
ऐसे मामलों में comments और supporting information को properly record करना महत्वपूर्ण है।
Reported Alerts कहाँ देखें?
EFRM में reported alerts के लिए अलग viewing option उपलब्ध है। Operational documentation के अनुसार इसमें ऐसे alerts देखे जा सकते हैं जिन्हें further investigation के लिए report किया गया हो या fraud के रूप में detected किया गया हो।
इसी तरह Closed Alerts section से पहले close किए गए alerts को भी देखा जा सकता है।
क्या एक साथ Multiple Alerts Process किए जा सकते हैं?
हाँ। उपलब्ध EFRM FAQ और operational guide के अनुसार multiple Alert IDs को select करके response और applicable actions को process करने की सुविधा उपलब्ध है।
जब एक ही प्रकार के कई alerts पर एक साथ action लेना हो, तो individual alert selection की बजाय available bulk-selection functionality workflow को आसान बना सकती है। फिर भी हर alert की underlying verification और correctness की जिम्मेदारी बनी रहती है।
eFRM का पूरा Workflow एक नजर में
FRMU से alert
Alert receive / assign
Verification
Response
Close / Re-assign / Further action
eFRM में काम करते समय Common Mistakes
- Alert को बिना verification के genuine या fraud मान लेना।
- Alert details को पूरी तरह check किए बिना response submit करना।
- Comments/observations को बहुत vague रखना।
- Further verification की आवश्यकता होने पर सीधे closure करना।
- गलत HO/SDO को alert assign कर देना।
- Pending alerts को समय पर process न करना।
- Confidential customer या transaction information को unauthorized जगह share करना।
- पुराने workflow को current process समझ लेना।
eFRM में Security और Confidentiality
eFRM में transaction और customer-related information से जुड़े details दिखाई दे सकते हैं। इसलिए इस information को केवल authorized departmental work के लिए ही इस्तेमाल किया जाना चाहिए।
- अपना APT/employee login किसी दूसरे व्यक्ति के साथ share न करें।
- OTP, authentication information या अन्य security details किसी को न दें।
- Customer transaction details को public WhatsApp group या social media पर share न करें।
- Alert screenshots को बिना authorization के circulate न करें।
- Official documents और reports को prescribed channel से ही share करें।
APT 2.0 से जुड़ी पूरी जानकारी
अगर आप APT 2.0 के portal, login, dashboard, employee services और common functions को detail में समझना चाहते हैं, तो यह guide भी पढ़ें।
Official और Useful Resources
eFRM जैसे departmental systems में काम करते समय official resources को primary reference रखना सबसे जरूरी है।
eFRM FAQ – Frequently Asked Questions
1. EFRM का Full Form क्या है?
EFRM का Full Form Electronic Fraud and Risk Management है।
2. eFRM का उपयोग किसलिए होता है?
APT 2.0 में eFRM suspicious alerts को देखने, assign करने, reply करने, re-assign करने, verify करने और आगे process करने के workflow के लिए उपयोग किया जाता है।
3. क्या FRMU और eFRM एक ही हैं?
नहीं। FRMU यानी Fraud Risk Management Unit है, जबकि eFRM यानी Electronic Fraud and Risk Management है। eFRM APT 2.0 में alerts के digital processing workflow से संबंधित है।
4. क्या HO/SDO alert को खुद close कर सकता है?
उपलब्ध EFRM operational documentation के अनुसार final closure Division login से किया जाता है। HO/SDO verification के बाद response submit करता है।
5. क्या eFRM में Alert को re-assign किया जा सकता है?
हाँ। उपलब्ध workflow में further verification के लिए alert को re-assign करने का option दिया गया है।
6. क्या Multiple Alerts एक साथ select किए जा सकते हैं?
हाँ। EFRM documentation में multiple Alert IDs को एक साथ select करके response/action process करने की सुविधा बताई गई है।
7. eFRM में कौन-कौन से alert types दिखाई देते हैं?
उपलब्ध FAQ और operational guide में CSI, CBS, CIS, ALL और Other जैसे alert type options बताए गए हैं।
eFRM Quick Checklist
- सबसे पहले alert की पूरी details देखें।
- Concerned office/HO/SDO सही select करें।
- Available records और system information के आधार पर verification करें।
- Response में clear observations/comments दर्ज करें।
- Further verification की जरूरत हो तो appropriate option चुनें।
- Genuine alert को applicable process के अनुसार close करें।
- Fraud/investigation-related case को prescribed workflow में आगे report करें।
- Confidential information को सुरक्षित रखें।
Conclusion
APT 2.0 में eFRM fraud-risk और suspicious alerts से जुड़े workflow को digital तरीके से manage करने की दिशा में एक महत्वपूर्ण module है। इसका सबसे महत्वपूर्ण हिस्सा alert को सही level तक पहुंचाना और verification के बाद सही response तथा आगे की action करना है।
खास तौर पर Division, HO और SDO level पर काम करने वाले officials के लिए View Alerts → Assign → Verify → Reply → Close / Re-assign / Further Action का flow समझना जरूरी है।
हालांकि system के operational screens और procedures समय के साथ update हो सकते हैं। इसलिए किसी specific case में latest departmental instructions, applicable SOP, APT 2.0 operational guide और competent authority के निर्देशों को final reference माना जाना चाहिए।